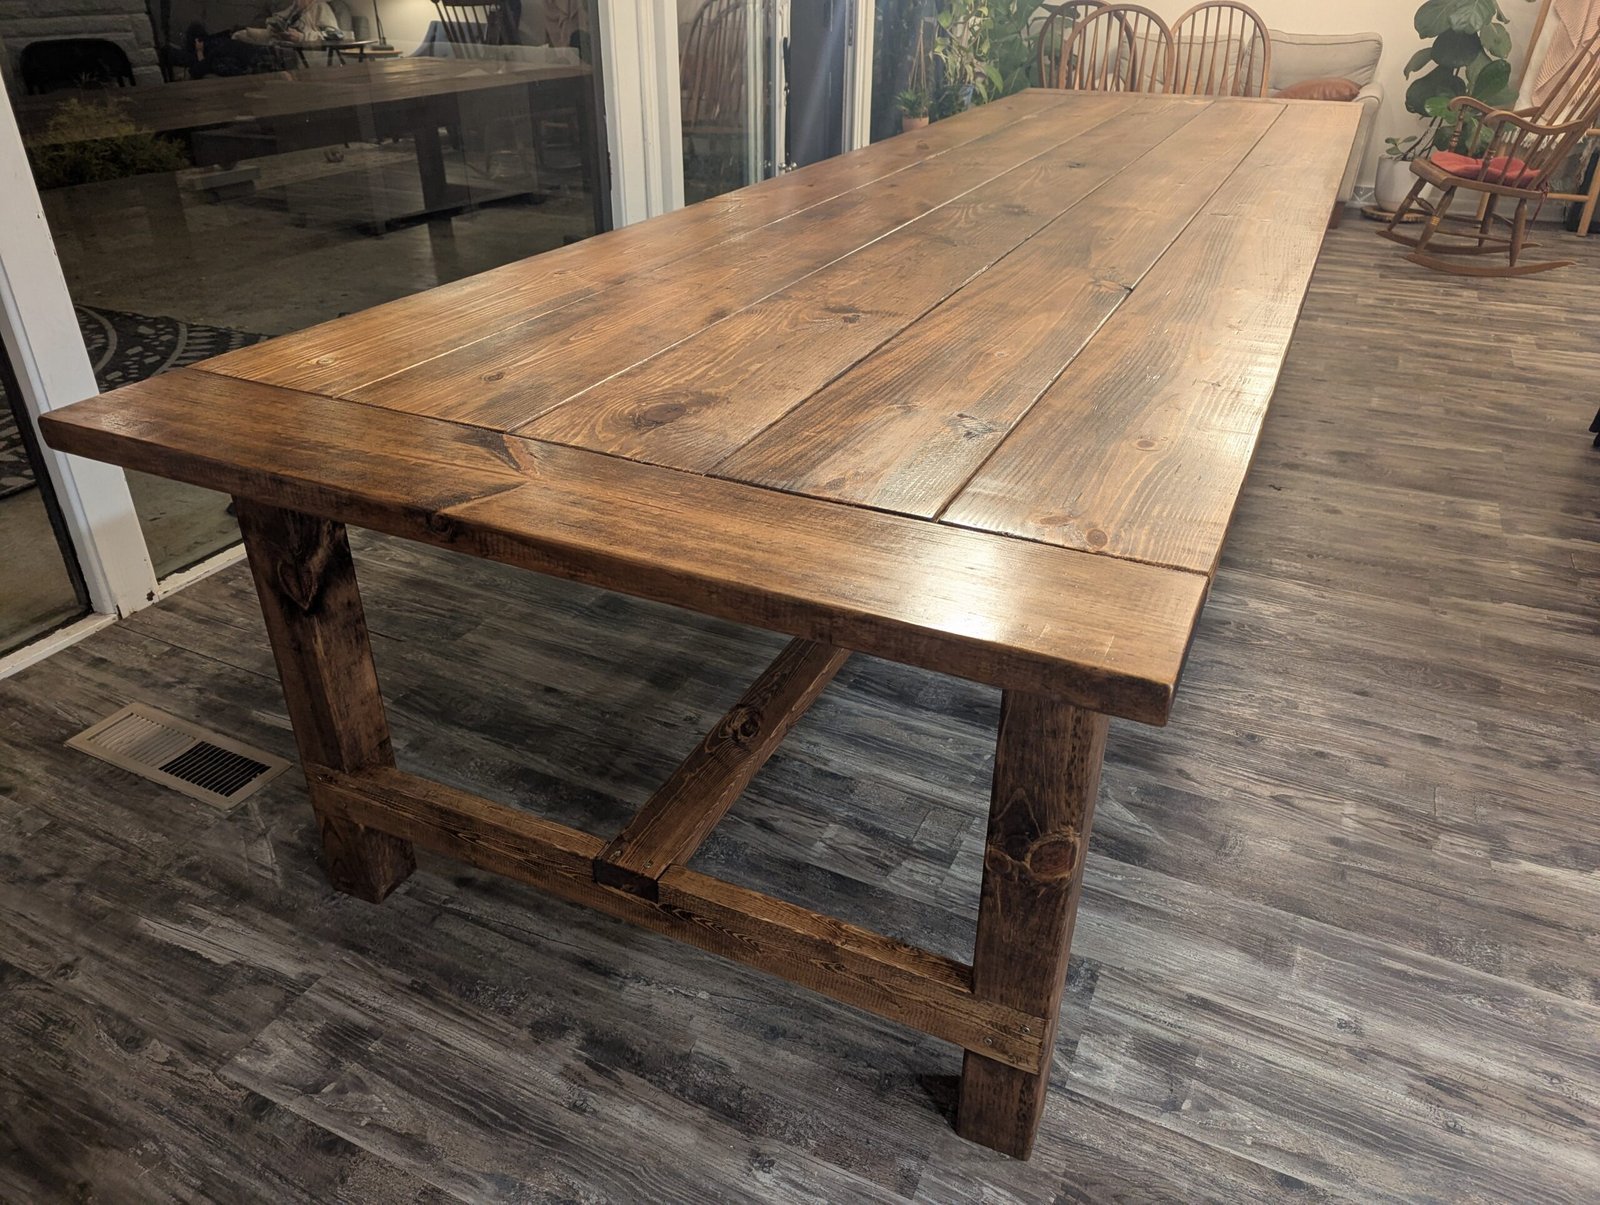
We built this table for friends who let us moochdock on their property. They're a family of six, we're a family of six, and there's a 13 year old neighbor we genuinely love - she's basically family in all the ways that matter.
That meant this table had one job: fit everyone. No folding tables. No kids table. No rotating shifts. Just one big table that could handle real life.
We started with Ana White's updated farmhouse table pocket hole plans because they're clear, beginner-friendly, and actually doable without a full woodworking shop. Then we headed to Home Depot and picked the best lumber they had that day - even if it wasn't the best lumber we could have bought.
This isn't premium hardwood. It's construction lumber. We sorted through the pile, picked the straightest boards we could find, and built something meaningful with what was available.


The Original Plan
We based our build on Ana White's updated pocket hole farmhouse table plans and kept the overall style and leg height the same. We just scaled the table up to 13 ft 3in and added one key structural change in the middle.
What We Changed
The aprons run the full length of the table with no extra side supports beyond the aprons themselves. The key difference is in the middle - we added a center 4x4 support and tied the base into it so the span stays solid long-term.
We notched out 1.25" on each side of the center 4x4 so the bottom runners could connect into it, and we used 2x4s to connect the long aprons to that center support. Simple, clean, and strong.
Final Dimensions
- Length - 159in (13 ft 3in)
- Width - approximately 46 1/4in
- Leg height - 29in
- Breadboard ends - 2x8
- Total legs - 5 (including a center 4x4 support)
Lumber List
We bought all of our lumber from Home Depot and picked through the stack to find the straightest boards we could. It wasn't furniture-grade hardwood, and it wasn't perfect - but it was the best material available to us that day.
Here's what we used:
- 5 - 2x10x12 boards (tabletop planks)
- 1 - 2x8x8 board (breadboard ends)
- 4 - 2x4x12 boards (aprons, runners, connectors)
- 4x4 lumber for five 29" legs (at least 1 4x4x12)
IMPORTANT NOTE: If you're building this exact table, you'll need more than one 4x4x12 to create five 29" legs. We happened to already have an extra 4x4 for the center support.
We fully expect this table to move a little over time. Construction lumber isn't static. But we also know that for a $250 table built for a specific season of life, it's more than enough.

Cut List (Our Exact Build)
| Component | Lumber | Qty | Cut Length | Notes |
|---|---|---|---|---|
| Tabletop Planks | 2x10 | 5 | 159in | Cut all boards to identical length to eliminate mill variance |
| Breadboard Ends | 2x8 | 2 | ~46 1/4in | Match final tabletop width |
| Legs (Including Center Support) | 4x4 | 5 | 29in | Requires more than one 4x4x12 to yield five legs |
| Long Aprons | 2x4 | 2 | 140in | Run full length of table |
| End Aprons | 2x4 | 2 | Measure to fit | Cut to inside leg spacing (ours were 34.75") |
| Bottom Runners | 2x4 | 2 | Measure to fit | Notch into center 4x4 (1.25in removed on each side) |
| Center Connectors | 2x4 | 2 | Measure to fit | Connect long aprons to center 4x4 support |
| Note: Aprons run full length. Only one center 4x4 support was added. No additional side supports were used beyond the aprons. | ||||

How We Built It
We assembled everything using pocket screws with a Kreg jig. That jig was easily the most important non-standard tool we used.
We cut all tabletop boards to the exact same length before assembly to eliminate mill variance, assembled the base with full-length aprons, then added the center 4x4 support. The bottom runners connect into the center support using 1.25" notches on each side, and 2x4 connectors tie the long aprons into that center support to keep everything locked in.
We also added breadboard ends using the 2x8 board for a classic farmhouse look and a cleaner finished edge.

Stain and Topcoat
We finished the table with Minwax English Chestnut stain and sealed it with a satin topcoat for indoor use. The stain is warm without feeling orange, and the satin finish gives it protection without looking glossy.


Cost, Timeline, and Expectations
We were around $250 in materials and finished the build in about 3 days total.
Day 1 was lumber selection, cutting, and building the base. Day 2 was the tabletop and breadboard ends. Day 3 was sanding, stain, and topcoat.
And here's the honest part - this is a $250 table. We don't expect it to be perfect, and we don't expect it to last forever.
It's built from construction lumber. It may move. It may dent. It will absolutely get scratched.
But that's kind of the point.
This table wasn't built to sit in a magazine. It was built to hold 13+ plates, loud conversations, craft projects, spilled drinks, and whatever season comes next.
If it lasts 5 years, great. If it lasts 15, even better. Either way, the memories will outlast the lumber.


Final Thoughts
Would we build it again? Absolutely. There's something special about a table that fits everyone at once - especially when "everyone" includes the people who aren't technically in your family but somehow still are.
If you're planning to build a farmhouse table this long, our biggest advice is to keep the structure simple and strong: full-length aprons, a real center support, and clean connections that carry the load.